Set-off

Kaoticor

Well-known member
Dear all,

We are getting problems with set-off and would like to see if any of you have suggestions:

Press: Komori Lithrone 28

Problem: We print 2 passes on cover material, a 210gsm paper. One side of the paper is a coated surface, the other side is uncoated. We first run the uncoated side, then run the sheets through on a second pass. The first pass is the inside of the book cover, and the second pass is the actual cover itself. We are trying to reduce/eliminate the setoff we get from the uncoated paper. The second pass has absolutely 0 ink set-off on the coated side.

**Note, when I say coated, i'm referring to coated paper, not Aqueous coating. I'll say AQ to refer to an aqueous coating***

We have tried many different things to reduce the set-off from the uncoated side of the cover to the coated side (or the set-off we are getting from the 1st pass). Again, we get no set-off on the second pass on the coated side of the paper, it's not even close.


We have tried:
Aqueous coating, and have tried several different types
We always run with best ink/water blance (have tried 3 different inks and then 3 different fountain solutions, including a fast setting ink, a scuff tuff ink, and a general ink).
IR Dryer and tested a wide range of lamp outputs
Spray powder with a wide range of micron
Small stacks at delivery
Loose delivery settings
Ran minimal ink densities we can to acheive quality: Colors at .80 and black at 1.25

I'm open to any suggestions or observations you might have as to how we might be able to minimize this. Thanks for taking a second,

K
 
Hi Kaoticor,

Just wondering what the ink coverage/ink limit is like on the inside page (uncoated).

Greg

The ink coverage is light except for a spot on the inside front, where there is some dark areas. The set-off is noticable from those areas, but not from the lighter areas. We ran minimum densities to try to help that out, then we curved our plates based off of minimum densities we felt produced acceptable quality.
 
Just a couple of suggestions as it looks like you have tried all the usual suspects.
Add ink drying stimulator to the fountain solution.
Check your drier/pile temps you may need to run different temps for the back up
Run fronts first and then you can use more spray on second pass(uncoated side).
Make sure your spray unit is working properly
 
From your description I would guess the ink on the uncoated side was dry before the second pass, could it be the ink is chaulking on the uncoated side? The migration of pigment to the surface of the ink while setting is the usual cause of complaints from the bindery that work isn't dry, even though it was printed on both sides, indicating it was dry when backed up. If you can't smear the ink with your finger, but can get it to dirty a piece of clean paper when rubbed against it, I would think chaulking is the culprit. I would try adding varnish to the ink when printing the first pass (the usual approach to chaulking) and see if that helps...
 
Set - off

Set - off

Hi Kaoticor,


Chalking on Coated-1-side (C1S) paper, I agree with Dan - use some Mid Litho Varnish - NOT Gloss Overprinting Varnish!

The Uncoated Side has a more open structure so allowing excessive absorption of the Ink Vehicle, which leaves the Pigment on the paper surface

Don't use Quickset Inks.


Regards, Alois
 
Last edited:
Ok all, have a quick update:

We tried a few of the suggestions but didn't seem to affect the end result. We tried running the front side first (C1S paper) then powdering the back side as much as possible. Spray powder machine is definitely working and we tried several micron ranges as well. However, running the front side first does eliminate some of the handling which is nice.

Our next step was going to be to try to adress possible chaulking. We have been waiting for some supplies to come in to test that out

Does anyone have other suggestions or ideas?
*Note* please see original post for some things we have already tried.

We have other printing facilties in different countries that print on the same grade of paper but do not get set-off. So we are almost 100% sure it can be improved with materials, however, those are not an immediate option for us, we need to see if there is anything we can do right now to improve it.

A couple of things we have tried additionally:
Had two different local ink techs analyze our paper we print on and make recommendations for an ink brand. No change...
Measured fountain solution with refractometer and tried running different brix readings from just under 1% to about 3.5%.
Added ink drying stimulator to inks.

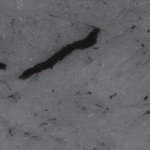
Attached is a picture before rubbing the sheet and after rubbing it. Dry sheet.jpg Dry sheet rub.jpg

Now a picture of what the rubbed off "ink" looks like compared to blank white background.
Dry sheet rub on to white.jpg
 
Last edited:
Problem !

Problem !

Hello Kaoticor,


Some questions !!!


A PDF


Regards, Alois
 

Attachments

  • Problem - Chalking v 1.pdf
    22.8 KB · Views: 273
Greg asked right question. Your solution is in prepress side. Just decrease ink limit with a devicelink profile. Colors will stay more or less same and then you can print easlily.
 
This may sound a little simplistic but have you tried running a rubber base ink on the uncoated side? I knew an old pressman, friends with Gutenberg I believe, that used to swear it was best to run rubber on uncoated stocks because of its oxidizing properties. I personally haven't run the stuff in decades.
 
Is it happening on the cutter under pressure or before? We always print the "coated" side first and then the uncoated with a 35 micron powder cranked up on the uncoated side. We use a combination drier in the ink as well as drier in the water. Make sure the alcohol sub is at a minimum.
We have seen set off onto the front when there is AQ applied to the front. The same job without AQ on the front will not set off. So, we let the job sit for an extra day and if we put in the correct "top and bottom" drier, the job cuts fine.
Ink guys will tell you 72 hours and if you run too much ink or have poor ink+water balance, it may be longer. Low pigment load may also be a contributing factor as well as the surface of the C1S papers.

It is happening before the cutter. In fact it happens slightly with the pallet just sitting there. Every time the pallet is handled it produces more of the undesirable quality (we are still in the process of adressing possible chalking as earlier comments mentioned). After print we also run a film laminate.

We do the same by printing the coated side first then powdering the backside heavily. This eliminates us having to jog the pallet for the second pass

We tried using the combination drier additives, but didn't seem to help our problem much. Ink water balance is at bare minimums, and we tried letting stacks sit for several days with no sucess.

Some of the other commentors mentioned a prepress solution, which we also tried. We replaced 4 color blacks with just black (kind of like an ink optimization), ran densities to lowest possible values that still produced acceptable gamut and print quality(K - 1.25, CMY @ .75-.8), then curved plates accordingly.

We even saved two test pallets for record keeping. After 2 weeks, one of them was still producing marking after handling. Only after about 3-4 weeks could they be handled without producing marking. In the meantime, we found a way to allow us to run, although I'm not sure the "ink" and paper issue has been fixed, whatever the issue is:

-We have to run a nip setting that is slightly more backed off then the normal "Kiss" for our AQ on the uncoated side of the C1S paper, along with a much higher coating feed of course
-Along with a lot more coating, we had to hook up some home-made exhaust to our drier to extract enough of the air. We have several fans helping this out... It looks kinda funny actually

So we know we can definitely protect the sheet with an out-of-the-box coating remedy, but I would like to have some closure on the problem as our publication requirements are always going further and further nowadays, and I can see us needing to print even more troublesome jobs in the future. Thanks for posting,

-K
 
Puzzled

Puzzled

Hello Kaoticor,

Fundamentals of Colour Reproduction and Set-Off


About replacing 4-Colour Black, does your company nor believe in the

benefits of - UCR/GCR?


Regards, Alois
 

PressWise

A 30-day Fix for Managed Chaos

As any print professional knows, printing can be managed chaos. Software that solves multiple problems and provides measurable and monetizable value has a direct impact on the bottom-line.

“We reduced order entry costs by about 40%.” Significant savings in a shop that turns about 500 jobs a month.


Learn how…….

   
Back
Top