Lotem 800 v image related error

K

kala

Guest
Hi Patch / Nemo

Once we removed the laser and ldd from 25-47 the doubling problem was solved... Now

Pls find attached image describes image problem that we faced in 48 laser Lbox changed machine..

1. fine small lines on edge of the image which is mentioned in the attachment..
2. fine vertical slantical lines over the image and dot which looks like moire..

Apart from elevation and delay test we have done everything...

Kindly clarify what is the purpose of doing elevation and delay test...

One more clarification i have seen laser uniformity test in Prinergy Xpo calibration..

Its better to clarify what is the usuage of that and how to do the calibration and settings in Laser uniformity test... Any idea???View attachment image error details 1.pdf

regards
kala
 
Look at my reply in capitals.

Hi Patch / Nemo

Once we removed the laser and ldd from 25-47 the doubling problem was solved... Now

Pls find attached image describes image problem that we faced in 48 laser Lbox changed machine..

1. fine small lines on edge of the image which is mentioned in the attachment..
2. fine vertical slantical lines over the image and dot which looks like moire..

Apart from elevation and delay test we have done everything...

Kindly clarify what is the purpose of doing elevation and delay test...ELEVATION ADJUSTMENT IS DONE WHEN THE FOCUS CHANGES ACCROSS THE DRUM
DELAY ADJUSTMENT IS MADE WHEN THE LINES ACCROSS THE PLATE DO NOT APPEAR SOLID AND STRAIGHT
UNIFORMITY ADJUSTMENT IS MADE WHEN SOME OF THE DIODES ARE WEAKER THAN THE REST.
RE. YOUR PROBLEM HAVE YOU REPLACED THE DDB BOARD AND BOOTED THE LOTEM WITH ALL THE DOORS CLOSED?
IS THE LOTEM OK WHEN USING 24 DIODES ( THE FIRST OR THE LAST?)
YOU COULD STILL HAVE A PROBLEM WITH THE STROBE BD./MCF BD/ AN LDD BOARD OR EVEN A MECHANICAL PROBLEM WITH THE LEAD SCREW/CARRIAGE/

One more clarification i have seen laser uniformity test in Prinergy Xpo calibration..

Its better to clarify what is the usuage of that and how to do the calibration and settings in Laser uniformity test... Any idea???View attachment 3011

regards
kala
 
Hi Patch / Nemo

Today we tried exposing 5/5 lasers to check and the results as below..

47-42 - image perfect no lines no issues - ok
36-41 - image lines problem - not ok
24-28 - image lines problem - not ok
18-23 - image perfect no lines no issues - ok
17-12 - image perfect no lines no issues - ok
6-11 - image perfect no lines no issues - ok
0-5 - image lines problem - not ok

then we tried to swap the LDD boards from 42-47 (which is ok) on 0-5 position (which also not ok) then we fired job from 0-23 we faced line problems..

so according to my observation iam thinking that laser is the problem pls advise me on below queries...

1. How we will check whether the lasers are placed in order from 0-47 ; why we are araising the question is earlier we tried some laser diode's swapped and forgot the home position then we faced doubling problem and lines problem then we tried our luck and we fixed few laser diodes back to home position then doubling problem was solved...
How we will identify which laser is the problem ??? Is it any easiest / simplest way to find laser is on correct position and working uniformly... Rightnow 24 lasers are working fine (6-11 / 24-35)..

Kindly suggest ?
Kala
 
Kala,
To see if you swapped some diodes,

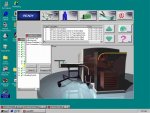
Run the auniformity test
Youo should see 48 squares
Check the distances between the diodes square are equals.
When two squares or more moved from their location, it means that you have swapped some of the diodes location

When diodes are swapped the squares will overlap.


between two or more diodes.
When ever diodes are swapped the diode box will move and will make overlap.


Hi Patch / Nemo

Today we tried exposing 5/5 lasers to check and the results as below..

47-42 - image perfect no lines no issues - ok
36-41 - image lines problem - not ok
24-28 - image lines problem - not ok
18-23 - image perfect no lines no issues - ok
17-12 - image perfect no lines no issues - ok
6-11 - image perfect no lines no issues - ok
0-5 - image lines problem - not ok

then we tried to swap the LDD boards from 42-47 (which is ok) on 0-5 position (which also not ok) then we fired job from 0-23 we faced line problems..

so according to my observation iam thinking that laser is the problem pls advise me on below queries...

1. How we will check whether the lasers are placed in order from 0-47 ; why we are araising the question is earlier we tried some laser diode's swapped and forgot the home position then we faced doubling problem and lines problem then we tried our luck and we fixed few laser diodes back to home position then doubling problem was solved...
How we will identify which laser is the problem ??? Is it any easiest / simplest way to find laser is on correct position and working uniformly... Rightnow 24 lasers are working fine (6-11 / 24-35)..

Kindly suggest ?
Kala
 
Hi Patch

Kindly advise what settings i have to keep ?

Is the attachment settings ok ...

regards
kala Laser Uniformity settings.jpg
 
Did you use tese values INT. FAC 0 0
NO OF STEPS 1
RES 100
Try and swap between 40 and 41 and see if the gap moves or it corrects itself.
 
Hi patch

Finally made the machine into running condition ; doing uniformity test and swapped the laser into home position made the machine perfect imaging... now i need ur help in 2 cases ;

1. After expose of each and every plate iam getting a error - plate stcuk in drum ; plate unloading failed from tray to unload ; unload tasking failed... (note that plate got ejected after showing this error) becaz of this we cant run the plates continuosly...
2. Sometimes got a error that gripper is not in position and manually releasing the plate and adjusting the gripper again..

all the above two errors planned to replace the silver sticker ?? is it advisable or not...

3. opposite punch side .5mm gripper difference is there (kindly note that another working lotem have the same problem .5mm on punch side) how to solve this.. both the machines centering belt was changed.. is anything neeed to do the tail grippers or somewhere else to solve this problem...

regards
kala
 
Hi Patch / Nemo

From morning onwards when unload the plate facing a error gripper not in position ; and plate is getting ejected 25% and tightly hold in head gripper ;

error as below :

Gripper not in position
The task unload gripper valve on switch failed
The task unload from drum to tray loading system failed
the task unload from tray loading system failed..

01. cleaned all the sensors (detectors)
02. changed metallic sticker
03. Did side to side detector test

Kindly advise what to do??

regards
kala
 
I wrote the reply in capitals.


hi patch

finally made the machine into running condition ; doing uniformity test and swapped the laser into home position made the machine perfect imaging...fantastic. Well done, kala. Now i need ur help in 2 cases ;

1. After expose of each and every plate iam getting a error - plate stcuk in drum ; plate unloading failed from tray to unload ; unload tasking failed... (note that plate got ejected after showing this error) becaz of this we cant run the plates continuosly...
2. Sometimes got a error that gripper is not in position and manually releasing the plate and adjusting the gripper again..

All the above two errors planned to replace the silver sticker ?? Is it advisable or not... Yes you can change the silver stickers. To test the unload of plates load a plate from the loading system with the covers open and cheetrs in and unload the plate and look when you get the error message. Check your air supply as maybe the unloading grippers do not open fully.

3. Opposite punch side .5mm gripper difference is there (kindly note that another working lotem have the same problem .5mm on punch side) how to solve this.. Both the machines centering belt was changed.. Is anything neeed to do the tail grippers or somewhere else to solve this problem... I am afraid but i do not understand your description of the problem.

Regards
kala
 
Hi Patch

pls find attached error log and screen shot...

iam getting the same error if i put cheater and unload also...

If iam not wrong, if airsupply is the problem then i may face loading also problem but in my case loading is perfect and unloading is the problem..

after expose there is a gripper difference on left side of the plate for eg; customer wants 50mm gripper; in my plate right hand side 50mm and left hand side 49.5mm (.5mm difference) hope u got my point...

regards
kalaerror screen shot_new.jpg

error log details :

View attachment Log_new.zip
 
Pls find attached general error fileView attachment General Error.zip.

at the time of expose the detector status us follow :

when idle the status is below :

Load gripper : UnLoad gripper :

1. Load gripper enable : off 1. Load gripper enable : off
2. Gripper Ep : off 2. Gripper Ep : off
3. Gripper Hp : on 3. Gripper Hp : on

casette to punch :

Load Gripper : unload gripper :

1. Load gripper enable : on 1. Load gripper enable : off
2. Gripper Ep : off 2. Gripper Ep : off
3. Gripper Hp : on 3. Gripper Hp : on

Punch to Drum :

Load Gripper : unload gripper :

1. Load gripper enable : on/off 1. Load gripper enable : on
2. Gripper Ep : on 2. Gripper Ep : off
3. Gripper Hp : on 3. Gripper Hp : on

after expose and upto gripper not in position error Unload gripper end position is not yet on / it shows off only....


apart from this there is a air leakage in casette loading / unloading whether this will affect unload kindly confirm;

if vaccum is the problem then i may get error in loading also but in my case iam getting error in unload only that also it ejects 1/4th part of the plate and balance 3/4 th got stuck in head gripper...

Kindly advise what to do nex...

try to arrange Ep detector new one on monday or plan to shift some ep detector from other position or from imagesetter to find out whether detector is the root cause or not...

regards
kala
 
Hi Kala,

I was away for a while. Kudos to you and Pach for fixing the diodes problem!

Your present unload problem is caused by the unload gripper enable sensor/sticker:
"DET STATE 0 Unload Gripper Enable Detector "
The valve will not function unless the gripper enable sensor is on.
From what I see in the logs, it seems to open the tail grippers fine but it fails after that so I suspect it does not see the sticker on the head grippers properly.
Try to clean/replace the sticker on the head grippers and replace the unload gripper enable sensor. If you already replaced the reflective tape, did you use the correct one or just some duct tape? Is it placed in the exact same position?
I also see drum vibration errors in the logs - adjust the vibration detectors.
The logs you posted do not match - the error log stops at 01:21 Oct 13th and the general starts at 08:14 Oct 13th.
Another suggestion is to reduce the "drum speed for unload" to 35

Regarding the alignment system - after replacing the belt did you calibrate it?
I see only 2 errors:
"Error - Iligal plate Size : Exp=1030 [mm], Actual Size:1038[mm]"
"Error - Iligal plate Size : Exp=538 [mm], Actual Size:560[mm]"
The difference reported in size seems too big to be a calibration problem though, especially since the error is intermittent. It is most likely a crooked plate or an intermittent short - is the plate straight when you get this error?

For the "illegal gripper position" error - increase a bit the side2side position/width tolerance (try 5 - max 8)
 
Last edited:
Pls find my replies online italic:

Try to clean/replace the sticker on the head grippers and replace the unload gripper enable sensor. If you already replaced the reflective tape, did you use the correct one or just some duct tape? Is it placed in the exact same position?

Let me try to replace the sticker and check the position or increase the base strength of reflective sticker and let u know ; after this planned to replace the ep detector but u mentioned enable sensor ; Is Ep / Hp and enable are various sensor ; if yes then where is the unload gripper enable senson located; becaz we knew that ep and hp are locating behind and very inside of tail gripper rod..

I also see drum vibration errors in the logs - adjust the vibration detectors.

rarely iam getting this error did u want me to adjust the vibration detector or not ? if yes then what is the procedure and where its located and advise how to do it...

Another suggestion is to reduce the "drum speed for unload" to 35

Where to reduce under hardware tree or registry or some where else ??

Regarding the alignment system - after replacing the belt did you calibrate it?

No i didnt ; just replaced the belt after that each plate horizontal i increase 8mm (for eg 800x1030 actual size means entered 800x1038 ; 600 x 730 actual size means 600 x 738 otherwise will get illegal plate size error) no error but in plate horizontal wise 8mm difference in centering thatwe manually adjust the position of the job in front end software...

Kindly advise how to do the belt calibration....


Apart from this both the machine iam facing .5 mm gripper difference old machine punch side .5mm difference and new machine opposite punch side .5mm difference ; kindly advise how to solve this.. For details pls find attached image..


For the "illegal gripper position" error - increase a bit the side2side position/width tolerance (try 5 - max 8)


rarely occurs but did side to side detector calibrate now ok ; no issues


Once again thanks for u and patch for ur timely help and replies....

regards
kala
 
Hi Nemo

Hi Patch

During unload , enable detector is not getting on, when we rotate the drum manually enable detector is getting on / off ... Is there is a need to change this enable detector or not kindly confirm...

Secondly, we raised the sticker level and we changed the sticker and moved the position little bit also no improvement.. kindly addvise what to do...

regards
kala
 
Last edited:
the unload "gripper enable detector" is the one mounted right above the stickers and looking down to them when the grippers are in the up position ready to be opened. Try cleaning it first. The gripper valve will not operate unless this sensor is on.
All Lotem settings are kept in registry and can be also be accessed through the software. Most of them under Loading System or Loading System Setup branch - do a search in regedit or PM me if not sure.
Regarding the gripper difference I see in your pics a 0.5mm difference that moved from one side to another. Is this consistent, on every plate? Did you touch the spiral punch?
If you didn't touch or adjust any settings on it, check first if the XY bar is parallel to the drum then try increasing the "X in drum final" value with 2mm
 
Last edited:
Hi Nemo

Unload problem was solved by fixed some strenghtening silver sticker...

Regarding Gripper difference i tried spiral punch calibration nothing worked ; Yes this 0.5 mm is consistent on all the plates sometimes .1mm difference...

Through registry i did the calibration ; manually i never tried adjusting the punch but i did earlier the same for my old working ctp nothing worked out...

Planned to change the air suckers.. ; if no improvement then finally punch adjustment...

The problem left behind me is only gripper difference .5mm difference left hand (punch) side on old machine and .1mm on right hand side of new machine...

Any other suggestions pls..

regards
kala
 

PressWise

A 30-day Fix for Managed Chaos

As any print professional knows, printing can be managed chaos. Software that solves multiple problems and provides measurable and monetizable value has a direct impact on the bottom-line.

“We reduced order entry costs by about 40%.” Significant savings in a shop that turns about 500 jobs a month.


Learn how…….

   
Back
Top