• Best Wishes to all for a Wonderful, Joyous & Beautiful Holiday Season, and a Joyful New Year!

PTR 4100 Lpi ratios

rafaqat

Well-known member
Our ctp machine PTR 4100 has the resolution of
1. 2400 2. 2438 3. 2540 dpi
if we want to set the values for test exposure , user manual show these ratios
2400 dpi : 150 lpi
2540 dpi : 159 lpi
2438 dpi : 152 lpi

i want to ask can we print more lpi ratios on our ctp machine ? like 75, 100, 133, 150, 175, 200. 225, 375 .
if we can , what sort of settings we need to change in my ctp machine.
 
Last edited:
Our ctp machine PTR 4100 has the resolution of
1. 2400 2. 2438 3. 2540 dpi
if we want to set the values for test exposure , user manual show these ratios
2400 dpi : 150 lpi
2540 dpi : 159 lpi
2438 dpi : 152 lpi
i want to ask can we print more lpi ratios on our ctp machine ? like 75, 100, 133, 150, 175, 200. 225, 375 .
if we can , what sort of settings we need to change in my ctp machine.

Could you quote the exact text from the user manual that says: set the values for test exposure"? It would provide a clear context.

It is interesting that if you divide the dpi by the lpi with those ratios you get 16 or as close as you can with those values. 16 x 16 = 256, 256 grey levels?
 
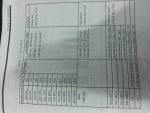
20150325_171730.jpg see attachment
 

You seem to have some difficulty with providing information. Do you see all the notes saying "refer to Fig. 5-54" ? It didn't occur to you that maybe including that image would help people figure out your question?

I'm just guessing that the image is probably something like this:
gatftarK_zpsygktcdlz.jpg


If that's correct then it's a CtP imaging test target - which has nothing to do with your question: "i want to ask can we print more lpi ratios on our ctp machine ?" But of course I'm just guessing because you're providing so little information.

Sheesh.
 
There is a very very big misunderstanding! This table describes the content of the test image built-in the machine. This image is used by the engineers to adjust the focus, zoom and laser power. It is not connected to the real jobs. Please read Gordon's forum for more information about the resolution and lineature.
 
i want to ask can we print more lpi ratios on our ctp machine ? like 75, 100, 133, 150, 175, 200. 225, 375 .
if we can , what sort of settings we need to change in my ctp machine.

Native resolution for your Screen 4100 is 2400 dpi, other resolutions (2438 and 2540 dpi) is optically approximated, so better way to use 2400dpi - usually is enough for 175-200 lpi for coated paper. For print more than 200 lpi you need to use other CTP (screen 4300/4300S for example)
 
Native resolution for your Screen 4100 is 2400 dpi, other resolutions (2438 and 2540 dpi) is optically approximated, so better way to use 2400dpi - usually is enough for 175-200 lpi for coated paper. For print more than 200 lpi you need to use other CTP (screen 4300/4300S for example)

thank you.
do i need to change settings from ctp machine or not?
how can we compare machine dpi with lpi
 
thank you.
do i need to change settings from ctp machine or not?
how can we compare machine dpi with lpi

You just need to make correct calibration of focus, zoom, light intensity and drum RPM on 2400 dpi for your plates.
Fill appropriate fields in "Set media type", "Set plate" and "Set printing machine".
Rip your file on 2400 dpi and spool to corresponding "Printing machine" on the CTP
 
You just need to make correct calibration of focus, zoom, light intensity and drum RPM on 2400 dpi for your plates.
Fill appropriate fields in "Set media type", "Set plate" and "Set printing machine".
Rip your file on 2400 dpi and spool to corresponding "Printing machine" on the CTP

is it means that i can print smaller than 175 to 200 LPI on my machine?
 
Last edited:
Quote from Harlequin RIP manual:

"Calculating Gray Levels
One of the strategies for producing a high-quality image is to in crease
the halftone frequency as much as possible, without reducing gray
levels below 256 (the maximum level that can be detected). To
calculate how many levels of gray are available at a particular halftone
frequency and output resolution, use the formula:
(dpi ÷ lpi) squared + 1 = gray levels
If you know the resolution at which you intend to print, the following
formula will help you determine the maximum frequency you can use
to maintain 256 grays:
lpi = dpi ÷ 16
If you need to produce a job at a required frequency, determine the
optimal resolution by using the formula:
dpi = lpi x 16"

Very good start but just a start.

Explanation: 16x16 pixels matrix gives 256 possible shades of values of each color (which is actually equal to 8 bit color space). Human eye can distinguish colors in 24 bit RGB palette so anything less would be undesirable. BUT CMYK color space is significantly smaller then full RGB spectrum and you can use smaller number of values (and therefore shades) of each process color without visible difference.

Higher LPI require higher DPI but it takes significantly longer time. So choose resolution accordingly: use lowest possible DPI for given LPI in order to have higher throughput keeping good dot definition and satisfactory number of shades of each color. Primarily choose LPI depending on quality of paper: lower quality of paper = lower LPI..
 
Quote from Harlequin RIP manual:

"Calculating Gray Levels
One of the strategies for producing a high-quality image is to in crease the halftone frequency as much as possible, without reducing gray levels below 256 (the maximum level that can be detected). To calculate how many levels of gray are available at a particular halftone frequency and output resolution, use the formula: (dpi ÷ lpi) squared + 1 = gray levels If you know the resolution at which you intend to print, the following formula will help you determine the maximum frequency you can use to maintain 256 grays: lpi = dpi ÷ 16
If you need to produce a job at a required frequency, determine the optimal resolution by using the formula: dpi = lpi x 16"

That's a great example of how misinformation and incomplete information gets perpetuated in the print industry.

That formula is only true for the tone represented by a single, isolated, halftone dot based on an individual halftone dot cell - something that never occurs in real production environments.

Around 1989 a new approach began to be adopted based on the fact that we don't care about individual halftone dots. What is important is the tone represented in an area. For example, let's say that we want to see a 17% tone patch value in the presswork. However, if we cannot represent that area with individual 17% dots – because of that classic formula limitation – we can still create the 17% value by alternating 16% dots and 18% dots (this is called "dithering"). The eye (and instruments) integrate the alternating 16% and 18% dots and the result is the average value - in this example 17% – our desired tone value.

This strategy is called "supercell screening". Since about 1995 all AM screens from all vendors adopted variants of supercell screening technology:
Agfa - ABS - Agfa Balanced Screening
Heidelberg - HDS - High Definition Screening, and later IS screening
Harlequin - HPS - Harlequin Precision Screening
Creo/Kodak - Creosettes/Maxtone
Fuji - CoRes screening

There are reasons that one might want to go to a higher dpi for their RIP than 2400 - but grey levels limitations isn't one of them:

A fuller explanation is here:

The Print Guide: Halftones and grey levels explained
 
Last edited:

PressWise

A 30-day Fix for Managed Chaos

As any print professional knows, printing can be managed chaos. Software that solves multiple problems and provides measurable and monetizable value has a direct impact on the bottom-line.

“We reduced order entry costs by about 40%.” Significant savings in a shop that turns about 500 jobs a month.


Learn how…….

   
Back
Top