Advice please - flaking toner when guillotining a solid edge which is face down

sidneykidney

Well-known member
Hi all you experts out there.
I've printed a menu on my Xerox Versant 80 toner based digital press which is 2 sheets of 350gsm Silk.
Both sheets have a solid blue background and they are then duplex glued back to back and after 24 hours I guillotine to A5.
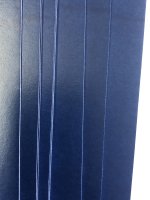
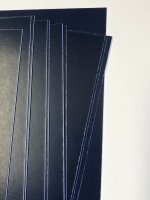
Front side looks excellent with nice clean edges but the reverse side is rough with flaking edges because I'm cutting against the toner.
I understand that laminating would cure the problem but does anyone have any solutions without laminating.

I've tried the following but still to luck:
1 - Printing on Silk, Gloss & Uncoated
2 - New blade on the guillotine
3 - Guillotine with the good edge facing outside of the blade instead of inside.
4 - Lots of waste card above and below the print job when cutting on the guillotine.

See attached pics of the front and back
 

Attachments

  • Good Top side.JPG
    Good Top side.JPG
    577.2 KB · Views: 268
  • Bad Bottom side.JPG
    Bad Bottom side.JPG
    409.3 KB · Views: 248
350 gsm is at the very upper limit of the v80's paper weight range. I would think with the combination of heavy toner coverage and paper weight that the fusing would have to be performing at it's very best to get you through this cutting. Have you tested with a lighter weight stock? Try spraying silicone on the blade that touches the finished edge of your sheets.
 
Good shout!!! I've tried the silicone spray with the new blade but I might try gluing 2 printed sheets of 200gsm to a 350gsm centre sheet with a hotter fuser and slower speed. Thanks
 
@sidneykidney I normally find your option (4) - padding with waste card - sorts this problem.
Is it grain related in any way? i.e. is the effect better/worse on the sides parallel with and against the grain
 
I don't have a solution but I was wondering if putting the engine in skip pitch mode would give you a little better toner adhesion. If it's enabled on your 80 then you can use NVM 740 492 - 0 is off, 1 is on. You need to restart the press after entering the NVM for it to take effect. It will run at half speed.
 
It could be that the problem is there's too much "give" on your edges. The stack is compressing slightly when you're cutting so your sheets are bending slightly at the edges during cutting which cracks the toner.
This is going to be a problem with anything with a core that gets too thick.

Figuring out how to "stiffen" up your cutting stack might help.
Things I would try:
1) Cut twice. Cut once about halfway between where you need it to be and your final cut. This can make your second cut firmer since the edge of the stack is perfectly supported by the sheets underneath it (all sheets are even).
2) Smaller stacks so there's less compression on the entire stack.
3) A piece of solid chipboard on the bottom of your stack.
4) Make sure your cutting stick is fresh so there's no give in the groove that forms there.
5) Craziest Idea - Crease the spot you're going to cut on the sheet before gluing. No idea if this would work but if we're trying random things. Theoretically this would compress that spot so that it can't "give" during cutting.
 
I don't have a solution but I was wondering if putting the engine in skip pitch mode would give you a little better toner adhesion. If it's enabled on your 80 then you can use NVM 740 492 - 0 is off, 1 is on. You need to restart the press after entering the NVM for it to take effect. It will run at half speed.
I actually ran this job in slow mode due to the solid blue leaving CMY lines and since you mentioned it, do you know of any solution to get rid of the black banding line.
 
It could be that the problem is there's too much "give" on your edges. The stack is compressing slightly when you're cutting so your sheets are bending slightly at the edges during cutting which cracks the toner.
This is going to be a problem with anything with a core that gets too thick.

Figuring out how to "stiffen" up your cutting stack might help.
Things I would try:
1) Cut twice. Cut once about halfway between where you need it to be and your final cut. This can make your second cut firmer since the edge of the stack is perfectly supported by the sheets underneath it (all sheets are even).
2) Smaller stacks so there's less compression on the entire stack.
3) A piece of solid chipboard on the bottom of your stack.
4) Make sure your cutting stick is fresh so there's no give in the groove that forms there.
5) Craziest Idea - Crease the spot you're going to cut on the sheet before gluing. No idea if this would work but if we're trying random things. Theoretically this would compress that spot so that it can't "give" during cutting.
Wow!!!! I've understood all of your solutions and am going to give each one a try but I must admit, I like number 5!!!
 
I actually ran this job in slow mode due to the solid blue leaving CMY lines and since you mentioned it, do you know of any solution to get rid of the black banding line.
Depending on the band(s) it could be a couple things. If the bands are repeating it could be a bad or near life end drum. I’d swap the drum with one of your other drums to see if it gets any better. If it's one band that is like a smear that is 208 mm from the lead edge of the paper it could be caused by a mismatch in speed between the fuser and the 2nd BTR roller. If it’s the smear Xerox recommends increasing the fuser speed (change in your custom paper settings for the paper you’re using). The skip pitch mode is also something that can help with some banding. When it’s in skip pitch mode you’ll know it because it’s slow, a lot slower than setting paper weight to 350 gsm.

I don’t have cracking issues when cutting duplexed 350 gsm stock printed on my 280, so my guess would be toner adhesion or as others have suggested a gap that’s created between the sheets from the film thickness of the glue. Different glue film thickness or maybe some type of extra clamping pressure before cutting.
 
1) Cut twice. Cut once about halfway between where you need it to be and your final cut. This can make your second cut firmer since the edge of the stack is perfectly supported by the sheets underneath it (all sheets are even).
Very good suggestion. I think it's worth a try. We primarily produce perfect bound books with 1/4" trim at the head and foot. If there's more trim than that, there's a tendency for the spines to chip. Our solution was to double cut the books.

If you flip your stack over does the toner cracking still occur on the bottom side?
 
Last edited:
Very good suggestion. I think it's worth a try. We primarily produce perfect bound books with 1/4" trim at the head and foot. If there's more trim than that, there's a tendency for the spines to chip. Our solution was to double cut the books.

If you flip your stack over does the toner cracking still occur on the bottom side?
I've just tried putting a 305gsm Uncoated sheet with Solid Black through the guillotine and it's come out very clean.
This now leads me to thinking that as mentioned by 'tngcas' and 'TJ Printer', there is too much give in between the glued sheets.
I'm going to try printed the 2 sides on thinner material with a heavier fuser temperature and glueing to a centre sheet.
 
Depending on the band(s) it could be a couple things. If the bands are repeating it could be a bad or near life end drum. I’d swap the drum with one of your other drums to see if it gets any better. If it's one band that is like a smear that is 208 mm from the lead edge of the paper it could be caused by a mismatch in speed between the fuser and the 2nd BTR roller. If it’s the smear Xerox recommends increasing the fuser speed (change in your custom paper settings for the paper you’re using). The skip pitch mode is also something that can help with some banding. When it’s in skip pitch mode you’ll know it because it’s slow, a lot slower than setting paper weight to 350 gsm.

I don’t have cracking issues when cutting duplexed 350 gsm stock printed on my 280, so my guess would be toner adhesion or as others have suggested a gap that’s created between the sheets from the film thickness of the glue. Different glue film thickness or maybe some type of extra clamping pressure before cutting.
This has been an ongoing problem for years which is why Xerox added the fly wheel. Slowing the machine down using the NVM method is what I do to eliminate the band lines for Cyan, Magenta and Yellow but I've been told by my Xerox engineers that there isn't a solution for eliminating the black band.
Whenever I run a grey, I either move the job over a bit to avoid the area or I cringe whilst printing.
I sure get it, I've been doing a lot of cringing for the past 2 years since I had the 280 installed. You've already done everything I would have tried - sorry I have no other solutions.
 

PressWise

A 30-day Fix for Managed Chaos

As any print professional knows, printing can be managed chaos. Software that solves multiple problems and provides measurable and monetizable value has a direct impact on the bottom-line.

“We reduced order entry costs by about 40%.” Significant savings in a shop that turns about 500 jobs a month.


Learn how…….

   
Back
Top