problem with .eps/.ai file used in indesign

wonderings

Well-known member
First off I am using CS4. I have a file from a customer, I am taking pieces from this .eps brochure he has and adding to something existing that I have set up in indesign. When I drop in this .eps file of a cartoon alligator with no background and has drop shadow, it has a white box around it in indesign in high res preview. If I get rid of the shadow in illustrator the white background is gone. Anyway I can keep the shadow from illustrator and have no background when I drop it in indesign? I know I can do the shadow in indesign as well, but would rather not try to match it and would be good to know for the future.

This is on a Mac running Snow Leopard 10.6.3

Thanks
 
Depends on how the shadow is made and how transparency is made. Illustrator blend modes are compatible in InDesign, shown with overprint preview. So if the shadow is an overprint object or set to multiply or darken, then the shadow will work as an InDesign shadow, though it will be harder to make changes, and there are advantages of doing as yous say, recreating the shadow in indesign.

If the file has been flattened via .eps compatibility, then you will not have a transparent illustrator shadow. There could be other factors such as spot colours that and what workflow you are using, if you hae some preflight forcing knockout on white or non black objects.

Separations preview is your friend ;)
 
Hi Wonderings

You mentioned placing the file as an .eps. When an eps file is saved out of Illustrator it gets flattened, which would account for the white box as the raster drop shadow is handled by the flattening engine.

Do you get the same results if you place the file as a native Illustrator .ai file? If the drop shadow is a native Illustrator element that would leave your transparency unflattened and should give you better results.

Shawn
 
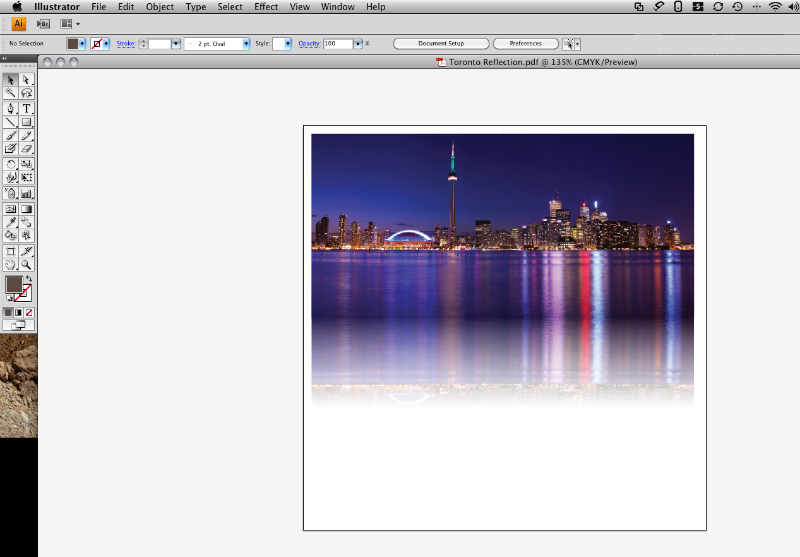
I get the same results with .ai files. I have another job I am working on and have this image I have done in Illustrator, just giving the basic reflective look.

1)
Screenshot2010-04-12at12545PM.png


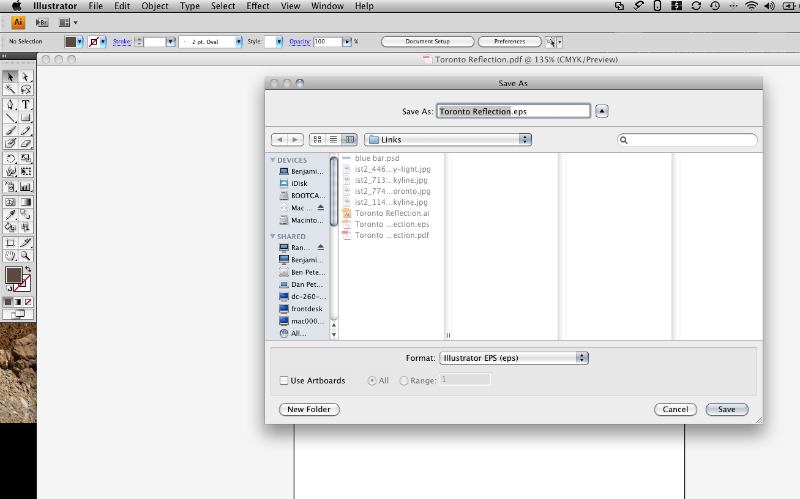
2)
Screenshot2010-04-12at12745PM.png


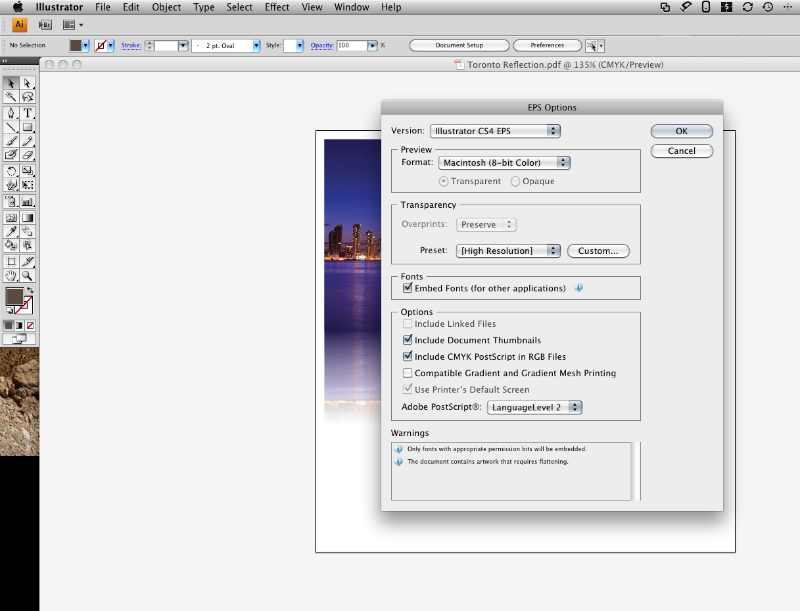
3)
Screenshot2010-04-12at12756PM.png


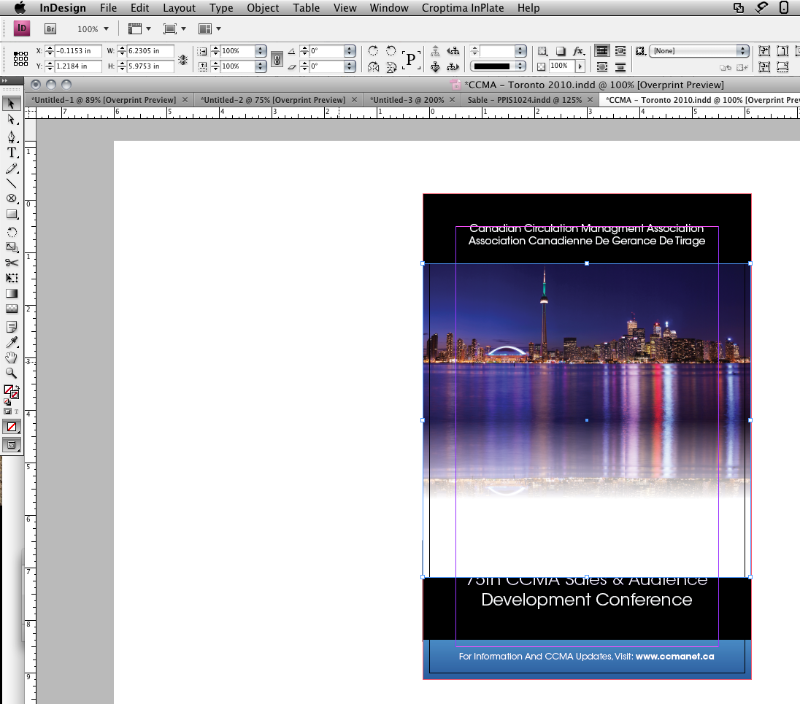
4)
Screenshot2010-04-12at12835PM.png


Now in illustrator it looks and works fine, its transparent as it should be. When I save as .eps or .ai it keeps the white background. There is probably something I am missing but just for the life of me cant figure it out right now.
 
It looks to me as though you're putting a transparent box over a solid image. I think if you want transparency in this particular case you'd be better off creating the image/reflection in photoshop and saving as a layered tiff or native psd.
 
It looks to me as though you're putting a transparent box over a solid image. I think if you want transparency in this particular case you'd be better off creating the image/reflection in photoshop and saving as a layered tiff or native psd.

My problem is I am not exactly sure how to do this in Photoshop. I tried google searching but have yet to come up a way to do it. Do you have a link to step by step tutorial I could check out?
 
It's easy, just make your canvas the size you need it and put the original image onto a layer. Remove the "Background" layer so that you have a transparent background. Copy the image onto an new layer and flip it to give your reflection. Then add a layer mask to the reflection layer and using the gradient tool create a horizontal black and white gradient on the layer mask. Whatever is black will be transparent, white opaque. Any grays will fall somewhere in between. Save it as a layered tiff or psd and you should be good to go.
 
@ the OP, if it's not too late -- save two copies of your alligator file, one with and one without the drop shadow. import the one with the shadow into INDD and set it to blend mode Multiply. Then superimpose the one with transparency working (but no drop shadow) as Normal blend mode. Done.
 
Your problem is that EPS doesn't support transparency.
Note that it says preserve overprint NOT preserve transparency.
You are not showing how you have made the transparency… is it an opacity mask?
It would work if you saved as an AI file but yo would have to enable over-print preview.
Doing the reflection in InDessign is ofcourse and option.
One more thing I hope the text is above the transparency or you will get rasterisation.
 
The simplest way to fix this problem is place the photo in InDesign and don't even mess with the other programs.

Then duplicate this photo (ctrl+c and then ctrl+p, OR ctrl+alt while dragging with your mouse arrow).

Then flip the duplicate (rotate it 180deg)

then go to 'object' 'effects' 'directional feather'

unlink the the feather boxes (right/left/bottom/top)

then set 'bottom' or 'top' with a feather however large you want.

Also be sure to line the images up at the base as you have above.


Gluck!
 
Hi ,

When modifing figures in Illustrator (eps and ai) already imported in InDesign, the InDesign rescale the figures and move them inside the frame, which I do not want to.

The only change I have to do to the figures is to convert the text of the figures in curves (in Illustrator). Of course the figure size is changing because the text frames are disappearing.

There is a way to keep the image at the same scale and in the same position as it was before converting the text of images in curves?

Remember, I do not want to replace/reimport the images (I have more than 2000).

Thank you for any suggestion you might have!
 
Last edited:
It depends on how the images are placed if they re scale or not.
Normally the placement is set to artwork bounds. If text is in frames you will need create and object with the same boundries as the text frame, to prevent the artwork box from changing. The object can be invisible if you like (no fill no stroke) it just needs to be there to give the file the right dimensions.
In future if you place graphics with another of the bounding boxes as reference you will be spared this problem.
 
Thank you! I was hoping there is a easier way to do this from the options of InDesign.
Thank you again! The way to go!
 
Unfortunately there needs to be a reference point on the artwork, and vector art defaults that way :(
I feel your pain. Why do you need to convert all the text to curves anyway? wouldn't it be more economical to buy the font than spend all those hours doing what I susspect you won't get either thanked or paid for?
 
There are a few options you may want to look at - all involving object styles if you need to do a whole lot of frames at once.

The first option is 'Frame Fitting Options' under 'Object Styles'.

Basically, select your box, go to object styles and create a new style, then scroll down to 'frame fitting options' under 'Basic Attributes'. There are a few fitting options, such as 'fit content proportionally' or 'fill frame proportionally'.

There are also some manual adjustments you can play with in there. Any object you apply this style to will keep the properties you set this style for.

It may not produce a perfect fit, but it changes the parameters of how any frame you set to this new style will import objects automatically. Which would help you with batch fitting.

It's better to have to correct just a few objects, than to have to do all of them from scratch, ya?

The next idea is sort of a work around as I'm not positive if you can change your frame sizes in batches.
So if you want ALL your frames to be a specific size because you know what size/style you need to fit the artwork to, but don't want to have to copy and paste from page to page or adjust every single image frame...you can:

Go to your 'Master Pages'. The default is 'A-Master' in the 'Pages' menu, I believe.

So double click A-Master and set the number of frames at a specific size and object style that you know you need for each page spread....(don't import your artwork yet - it will just put the same artwork on every page if you do that now.)...then click back to your normal pages.

...if the master page objects haven't shown up:

Select all the normal pages in the 'Pages Tab'. Once they are all highlighted, right click and select 'apply master to pages...'

This will apply any frames you set on that master page to ALL your pages locked and behind anything else you've put on them.

To unlock them in your normal pages so you can import different art for each page, select all the normal pages in the 'Pages' menu again. This time select 'override all master page items'

Suddenly you will have resized box frames set for a specific style, or any other objects you wanted as a template on every page. They will now be workable and available on a page-by-page basis without the extra time of having to replicate it through 30 some-odd pages.

Neither of these is a perfect solution for what you need, but it will help get you on the road to using styles/template stuff as a solution, and so decrease a bit of your manual labor time to just the images that really need it.
 
Thank you all for your time and your detailed answers.
The book is now ready to be printed. It was a big amount of work because the huge number of figures but thanks to your answers (all have helped) I figured out the best method for my book.
Thanks again,
Cerstine
 
Last edited:

PressWise

A 30-day Fix for Managed Chaos

As any print professional knows, printing can be managed chaos. Software that solves multiple problems and provides measurable and monetizable value has a direct impact on the bottom-line.

“We reduced order entry costs by about 40%.” Significant savings in a shop that turns about 500 jobs a month.


Learn how…….

   
Back
Top